
This article shows the fastest way to get a Camunda Platform server running on Microsoft Azure with command line usage. You should be comfortable with using a command-line interface (CLI), otherwise please switch to my blog “Anyone can run Camunda BPM on Azure in 10 Minutes”.
The resulting server will be suitable as a (shared, insecure) playground accessible via the internet. It is not a secure setup suitable for production usage. A technical operator setting up a production system would certainly approach things differently and possibly choose different Azure services.
Azure Access
To deploy anything on Microsoft Azure you obviously require an Azure account. If you do not already have one, the sign-up is easy and usage during the first 12 months or within an initially granted 200 USD budget is free. If required, register for an account.
Azure Command-line Interface
The Azure CLI is “a set of commands used to create and manage Azure resources”. We can use a local installation or an Azure Cloud Shell. Any of the three options will work for the few Azure CLI commands we need.
Locally installed CLI
If you would like to run the CLI on your own environment run the command suitable for your operating system:
Mac: brew update && brew install azure-cli
Linux with Apt or WSL: curl -sL https://aka.ms/InstallAzureCLIDeb | sudo bash
Win: Invoke-WebRequest -Uri https://aka.ms/installazurecliwindows -OutFile .AzureCLI.msi; Start-Process msiexec.exe -Wait -ArgumentList ‘/I AzureCLI.msi /quiet’; rm .AzureCLI.msi
Docker: docker run -it mcr.microsoft.com/azure-cli
or see the full installation instructions.
After successful installation it should be possible to login from the command-line using az login


Requiring a local installation and updates could be considered a minor disadvantage. A small benefit, compared to the following cloud shell alternatives, is that local CLI usage does not require cloud storage.
Cloud Shell
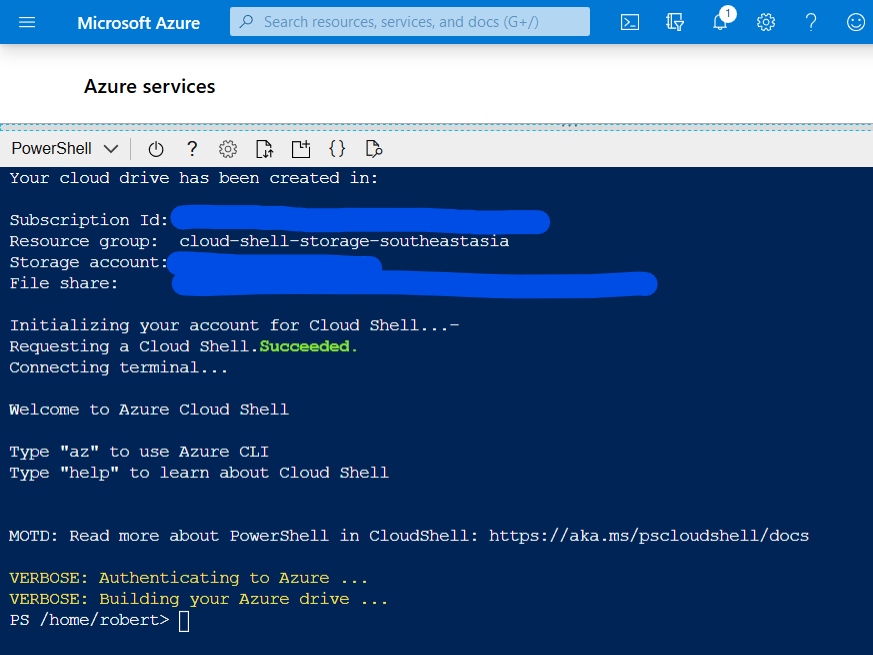
A cloud shell can be opened embedded into the Azure portal. Login at the Azure portal, then use the Cloud Shell button next to the search bar on the top to open a shell window at the bottom of the page.

The same cloud shell window is also available standalone under Azure Cloud Shell.
Azure File Share
When the cloud shell is used for the first time, a file share suitable for the usage of the shell can easily be created automatically. Just click Create Storage. If required, the advanced settings can be used to control subscription, region, resource group, storage account, or to select an existing storage account. The automatic setup will create these entities for you.

PowerShell or Bash
When you proceed with the file share creation, Azure will create the file share setup, configure your cloud shell to use it, and open a new cloud shell using PowerShell (Powershell Quickstart Guide). However, Azure also supports GNU Bash (Bash Quickstart Guide).

The drop-down field on the top left of the shell window allows you to easily change the shell type.

Resource Group Creation
Azure resources are managed and organized in resource groups. All Azure resources must be deployed into one. So, before we can create a container instance, we need to create a resource group. You can freely choose a name, for instance rg-camunda.
For the region, choose the location closest to you or to the location the server will be accessed from. The command az account list-locations -o table displays a list of locations available to your account/tenant/subscription. After choosing a suitable region you can create a resource group in this location by using the value from the name column and in the command: az group create –name rg-camunda –location yourLocationName

With az group list we can list the existing resource groups.

Container Instance Creation and Start
The Azure Container Service allows you to quickly deploy container images, Kubernetes, DC/OS, or Docker Swarm cluster. For our purpose we are going to create a container instance to run a simple Docker image.
The command az container create –resource-group rg-camunda –name camunda-run initiates the creation of a new container instance named camunda-run in the resource group rg-camunda.
Out of the Docker images for the Camunda platform, Camunda BPM Run is easiest to use:
Camunda BPM Run is a pre-packaged distro of the Camunda BPM platform, including the Camunda webapps (Cockpit, Tasklist, Admin) and the REST API.
The idea behind Run is to provide a full Camunda BPM distro with a simple but powerful configuration mechanism that can be operated by everyone, regardless of their knowledge about Java or application server configuration.
Camunda Platform Run Guide
The image identifier camunda/camunda-bpm-platform:run-latest
always points to the latest version of the Camunda BPM Run distribution.
Add –image camunda/camunda-bpm-platform:run-latest to the command to specify this image.
To specify the memory and CPU configuration for the container instance we add –cpu 1 –memory 0.5
The parameter –dns-name-label your DNSLabel allows use to specify the
DNS name label.
Use a name of your liking, consisting of only lower case letters or dashes. The label will become part of the URL which will be used to access your server and has to be unique within the previously selected region.
The Camunda BPM Run image uses port 8080 for the web application. We need to instruct Azure to make this port accessible from the internet by adding the parameters —ports 8080 –protocol TCP to the command.
The REST-API, which can be used, for instance by the Modeler or external services, to communicate with the server is included in the Camunda BPM Run distribution, but by default not secured (suitable for installation e.g. on own laptop). As our server will be accessible from the public Internet, we should secure it. Conveniently, Camunda BPM Run is prepared to allow this via a simple switch, which can be passed in via an environment variable. To add the setting we add the parameter _-environment-variables SPRING_APPLICATIONJSON= ‘{“camunda.bpm.run.auth.enabled”:”true”}’
Altogether, the complete command to create a Camunda BPM Run container instance in the latest version and run it is:
_az container create –resource-group rg-camunda –name camunda-run –image camunda/camunda-bpm-platform:run-latest –dns-name-label robs-camunda –ports 8080 –protocol TCP –cpu 1 –memory 0.5 –environment-variables SPRING_APPLICATIONJSON='{“camunda.bpm.run.auth.enabled”:”true”}’
Depending on Azure’s resource availability at the particular time, completing the deployment can take just one or several minutes. Once the command completes the response shows all parameters and attributes of the new container instance.

After successful start-up the server will become available under the Fully Qualified Domain Name (FQDN), which you can find near the end of the response. It consists of _dnslabel.region.azurecontainer.io.

To see the container’s standard output and follow the server startup, we can use az container attach –resource-group rg-camunda –name camunda-run

The start-up should take approximately 15–20 seconds.
You can disconnect your shell from the container output using Ctrl-C

The web portal will be accessible under the FQDN on port 8080. In this example the FQDN is robs-camunda.southeastasia.azurecontainer.io
so the URL of the web portal is: https://robs-camunda.southeastasia.azurecontainer.io:8080

After opening your server’s URL https://yourFQDN:8080 in your browser you should see the login page. Use demo /demo to login, then use the web portals as described in the web applications documentation.
Most browsers indicate that the page is insecure. This is because https is not enabled and means that the communication between this server and your browser is not encrypted. On any system of importance you would, among other steps, register your company’s security certificate and enable https for Camunda Platform Run.
The REST-API will be accessible at https://yourFQDN:8080/engine-rest.
CHANGE THE PASSWORD!
After logging in, use the Change Password link in the Profile section on the right to change the password.

Is the REST API secured?
To confirm securing the REST-API was successful we can access for instance
https://yourFQDN:8080/engine-rest/deployment in the browser or using curl. In this example the test URL would be:
https://robs-camunda.southeastasia.azurecontainer.io:8080/engine-rest/deployment
If the REST-API is secured then the browser will display a login screen,
curl -I https://yourFQN:8080/engine-rest/deployment shows a response with the HTTP status code 401.
Adding the correct (changed) credentials to the command
curl -I https://yourFQN:8080/engine-rest/deployment -u demo:newpassword should lead to HTTP status code 200.

The credentials (changed in the paragraph above) or a newly created account can be used to login.
Deploying a Process Model
Depending on the Camunda Edition and the tools available to you, there are many ways to deploy a process model to your server via the REST API
(curl, postman, Camunda EE portal,…).
As you will first have to model the process, an easy way to do this is to download the Camunda Modeler and use its built-in deployment feature.

In the deployment dialog, opened via the Deploy current diagram menu icon, you need to specify the REST endpoint URL of your server: https://yourFQDN:8080/engine-rest
In this example it is: https://robs-camunda.southeastasia.azurecontainer.io:8080/engine-rest

If you successfully secured the REST API then you will have to select Authentication: HTTP Basic and provide the Username and Password you use for the portal login. A notification will confirm a successful deployment. From now on the model will be visible in the Deployment view in your Camunda Cockpit and executable via the Camunda Tasklist (or other clients).
Stopping, Cleaning up or Restarting
To avoid unnecessarily burdening your budget ensure you stop the container instance while it is not needed.
To control you container instance use
- _az container list -o table to see a list of your containers,_
- _az container stop -g rg-camunda -n camunda-run to stop the instance,_
- _az container start -g rg-camunda -n camunda-run to stop the instance,_
- _az container delete -g rg-camunda -n camunda-run to delete the instance._

After the container instance has been deleted, the resource group can be deleted using az group delete -n rg-camunda.
It may take a bit until a resource or resource group is deleted.

After the command has completed, we can check the resource / groups lists with az group list -o table and az container list -o table.
Conclusion / TLDR
Using the only these two commands you can now create a new Camunda BPM instance on Azure within less than 5 minutes!
Create a resource group:
az group create --name rg-camunda --location yourLocationName
(Locations e.g. westus, eastus, brazilsouth, westeurope, northeurope, centralindia, westindia, southeastasia, japanwest, australiasoutheast)
Create and start the Camunda BPM Run container instance:
az container create --resource-group rg-camunda --name camunda-run --image camunda/camunda-bpm-platform:run-latest --dns-name-label robs-camunda --ports 8080 --protocol TCP --cpu 1 --memory 0.5 --environment-variables SPRING_APPLICATION__JSON='{"camunda.bpm.run.auth.enabled":"true"}'
Access instance via https://dns_label.region.azurecontainer.io:8080
Clean up using:
az container delete -g rg-camunda -n camunda-run and az group delete -n rg-camunda